Krautkramer Hardness Testing
US |
UK |
DE |
ES |
FR |
?? |
?? |
|||
| Hardness Testing Overview | 232KB | 232KB | 233KB | 234KB | 234KB | ||||
| Application Guide | 1.06MB | 1.09MB | |||||||
| DynaPOCKET | 476KB | 476KB | 478KB | 480KB | 478KB | ||||
| DynaMIC | 173KB | 199KB | 201KB | 393KB | |||||
| MIC 10 | 177KB | 194KB | 175KB | ||||||
| MIC 10R | 135KB | 125KB | 126KB | ||||||
| MIC 20 | 181KB | 201KB | 205KB | ||||||
| TIV | 172KB | 171KB | 169KB | 368KB | 369KB | ||||
| MIC Probes | 201KB | 201KB | 202KB | 143KB | 195KB | ||||
| MICRODUR Probes and Accessories | 436KB | 434KB | 435KB | 434KB | |||||
| MIC 225 | 133KB | 127KB | 127KB | 127KB | 127KB | ||||
| MIC 227 / TEST SUPPORT | 125KB | 152KB | 153KB | 153KB | 151KB | ||||
| UltraHARD Software for MIC10 / DynaMIC | 327KB | ||||||||
| UltraDAT Software for MIC20 / TIV | 425KB | ||||||||
|
|||||||||
Two methods
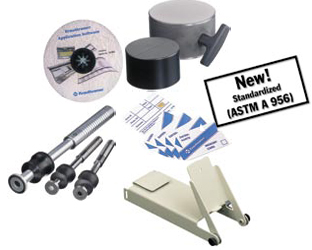
One concept. The impact of a thousand and one powerful arguments. We offer you a choice for quick and easy on-site hardness testing: the hardness testers MIC 10 and DynaMIC combine two different physical methods - the static UCI and the dynamic rebound hardness testing - in one uniform operational concept. The DynaMIC carries on the proven tradition of the MICRODUR testers: ease of operation in field testing situations. Just position the impact device and read the hardness value - that is hardness testing in a matter of seconds. What’s more, you can measure everywhere and in any direction: in horizontal or overhead positions - without any restrictions. We are particularly proud of the patented function to measure independent of impact direction because it makes your job even easier. As the DynaMIC only weighs 300 grams, you can easily carry it with you to any test location. You can use the DynaMIC for rebound hardness testing - according to ASTM standard A956 - on large, coarse-grained components with rough surfaces, on forgings with inhomogeneous surface structure, as well as all types of cast materials. Different impact devices are available to ensure an optimum match to the material and application.
Accuracy, ease of operation, data processing impact beyond compare!
Accurate test method. The DynaMIC operates according to the rebound method in which an impact body is impelled against the test surface by spring force. The hardness value is calculated from the ratio of speed of the impact body before impact and after rebounding from the test piece. To improve on this established testmethod, the DynaMIC employs a patented and innovative signal processing technique that automatically compensates for changes in impact direction and distance variations caused when measuring small radii. High-tech for your convenience. With the DynaMIC you are immediately able to carry out measurements in any direction without affecting the accuracy of the test results. It is unnecessary to enter the impact direction of test prior to taking a measurement. This well-known advantage of the UCI method is now at long last also available for rebound hardness testing using the DynaMIC. In addition, the well-proven calibration feature of the MIC 10 has been adopted in the DynaMIC. A precise calibration for a specific alloy within one of the nine preset material groups or an exotic material is quickly performed and easily recalled later. The DynaMIC even allows you to generate and store additional, company-specific material groups. By simply pressing a key you can choose between displaying a single value or the average value of a measurement set. Adjustable alarm thresholds indicate critical readings to you both visually and audibly. A special configuration feature allows you to select the scales and features for your particular testing requirements. This simplifies operation and increases operational reliability. The DynaMIC also ensures measurement reliability by displaying the total number of all measurements taken with an impact device. This assists in scheduling maintenance or predicting replacement of the impact body. Exquisite data security. The DynaMIC DL Data Logger model can internally store hardness values along with calculated statistical information. The instrument accepts memory cards which can supplement this data storage capacity and be used as parameter cards. As a parameter card, calibration values and instrument settings can be easily stored and recalled, which ensures the integrity of the test results and simplifies future instrument set-up. You can print out test reports in a format of your choice or transfer your data to the PC via the RS232 interface. Our application software from the Ultra- HARD series offers you numerous possibilities for further data processing.


